You can upload files to your 369Hosing cPanel account using an FTP program, but if you prefer a web-based alternative, there is a File Manager built into cPanel.
To access the File Manager, log in to 369Hosting and go to cPanel by clicking the “cPanel Login” button in the “Quick Server Login” section.
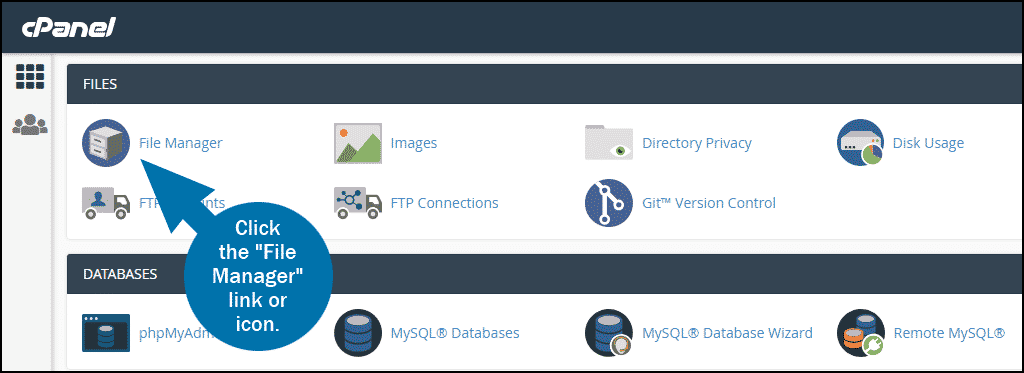
In the “FILES” section, click the “File Manager” link or icon.
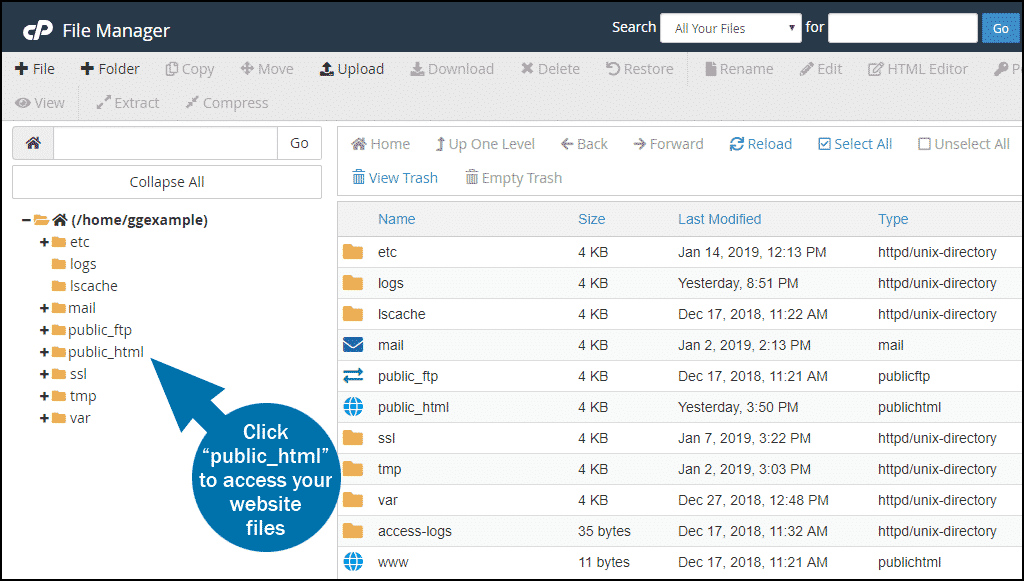
When you log in to the File Manager, you will be in the root directory for your account. Most of the time you’ll be working with website files, and they are located in the “public_html” directory.
To Upload a File to the cPanel File Manager
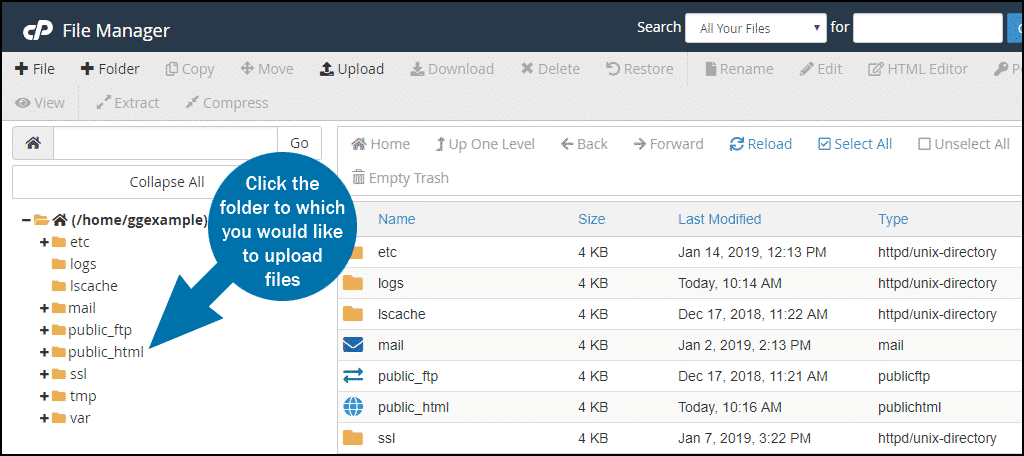
On the left side, click the folder to which you would like to upload files. The folder contents will be displayed on the right side.
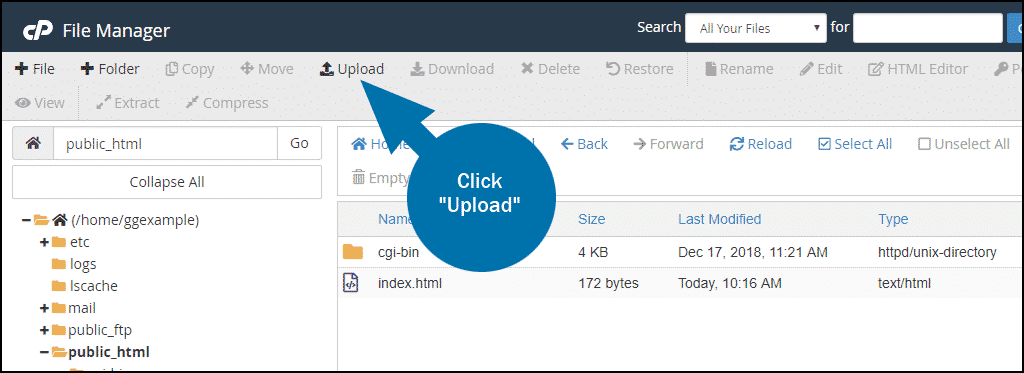
Click “Upload” in the top toolbar.
A new browser tab or window will open for file upload. Drag and drop the file to be uploaded, or click the “Select File” button.
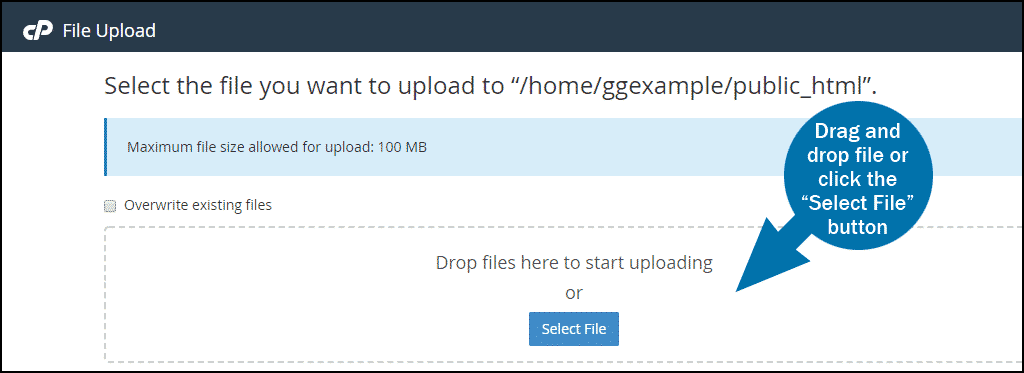
If you are replacing an existing file, check the “Overwrite existing files” box (if you don’t check the box you will get a pop-up asking if you want to overwrite the existing file). You can upload files up to 100 MB in size using File Manager. For larger files, use FTP.
